Shady Pixels
In a previous post I mentioned the new Zune 3.0 visualizations. I really liked them, so I decided to try and create them using WPF’s new (3.5 SP1) Effects.
A while ago I wrote about BitmapEffects, and why you should try to avoid them. Effects replace BitmapEffect with an elegant, hardware-accelerated API. An Effect is comprised of a class that derives from ShaderEffect and another file written in HLSL (High Level Shader Language), which is a C derivative. What you’re basically writing is a function that receives the coordinates of a pixel and returns a color – a pixel shader. If you want to learn how to write one, I suggest checking out Greg Schechter’s series. You should also have a look at the WPF Effects Library, which has a host of ready to use effects, and also shows a great way of using effects to create transitions.
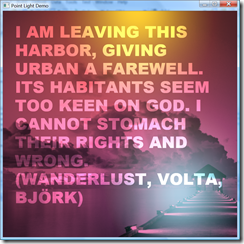
Now, for my Zune mimic. I created two effects: Blend (which blends one element with another) and PointLight (which colorizes an element and adds two light orbs). I also added a few animations to the demo app, which made it look more like Zune. The result is quite pleasant.
Although I’m quite satisfied with the API, there are a few things that aren’t so good:
- Debugging effects is not trivial.
- Using multi-input effects on a few UIElements is cumbersome. You have to use a VisualBrush. There should be a way to apply an effect like Blend by specifying the two (or more) elements it’s supposed to work on.
- You cannot apply an effect to the background of a Visual. What I mean is that creating an effect like Glass in Vista is impossible. If I apply a BlurEffect on a semi-transparent surface, only the contents of that surface will be blurred, and not what’s visible through it.
To compile the attached project, you will need the Shader Build Task and Templates, available at codeplex.com/wpf (WPF Futures release).
Attachment: PointLightDemo.zip